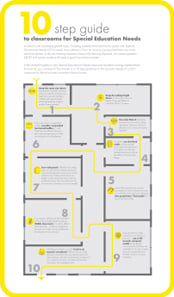
The 10 step guide to classrooms for Special Educational Needs
Inclusion is an increasing global topic. Creating suitable environments for pupils with additional learning or Special Educational Needs (SEN) now requires more attention.
From an acoustic perspective there are many sensitive listeners that all need a good sound environment:
- profound hearing impaired
- temporarily hearing impaired
- non-native speakers
- ADHD and autistic students
In the United Kingdom a new Special Educational Needs classroom standard is being implemented. So how do you achieve it? The answer is a 10 step guidance approach to the acoustic design of a SEN classroom by British acoustic consultant Adrian James. Read it below, or download the infographic.
10 step guide
to classrooms for Special Education Needs
![]()
Keep the room size down. Reverberation naturally increases with room volume, so large rooms need more acoustic treatment. Children with special needs should generally be taught in smaller classes anyway.
![]() Keep the ceiling height down, for the same reason as above. Things get difficult at more than about 2.4 meters.
Keep the ceiling height down, for the same reason as above. Things get difficult at more than about 2.4 meters.
![]() Use only “Class A” absorptive finishes – these are the most efficient and so reduce the areas required. However, the SEN standard also controls low frequency (bass) reverberation time, so you will also need some bass absorption (more info in step 5).
Use only “Class A” absorptive finishes – these are the most efficient and so reduce the areas required. However, the SEN standard also controls low frequency (bass) reverberation time, so you will also need some bass absorption (more info in step 5).
![]() If possible, use dry-lined walls as these provide some useful bass absorption at no extra cost. The new standard also lets you include the effects of furniture and fittings.
If possible, use dry-lined walls as these provide some useful bass absorption at no extra cost. The new standard also lets you include the effects of furniture and fittings.
![]() A conventional “Class A” suspended ceiling tile is most efficient and provides some bass absorption, especially if you use proprietary “bass pads” on top of the tiles.
A conventional “Class A” suspended ceiling tile is most efficient and provides some bass absorption, especially if you use proprietary “bass pads” on top of the tiles.
![]() Consider suspended horizontal baffles or “rafts" if you can’t have a suspended ceiling. These are very efficient because both sides are absorptive, but they are not great at low frequencies.
Consider suspended horizontal baffles or “rafts" if you can’t have a suspended ceiling. These are very efficient because both sides are absorptive, but they are not great at low frequencies.
![]() Use wall panels. Whatever the ceiling type, you will almost certainly need some acoustically absorbent wall panels as well. At least some of these should be at ear height, so they should be robust.
Use wall panels. Whatever the ceiling type, you will almost certainly need some acoustically absorbent wall panels as well. At least some of these should be at ear height, so they should be robust.
![]() Find out if the classrooms have special demands around energy savings i.e. specifically designed Thermally Activated Building Systems (TABS) for classrooms achieving the SEN standard is difficult and expensive – but not impossible.
Find out if the classrooms have special demands around energy savings i.e. specifically designed Thermally Activated Building Systems (TABS) for classrooms achieving the SEN standard is difficult and expensive – but not impossible.
![]() Use a 3-D acoustic computer model for the design! Conventional “Sabine” reverberation time calculations are unreliable for this type of room.
Use a 3-D acoustic computer model for the design! Conventional “Sabine” reverberation time calculations are unreliable for this type of room.
![]() Involve an acoustic consultant! It follows that you need acoustics consultants who are experienced in this type of design. Get them involved early to advise on room shapes and sizes, and make sure that they test and commission the completed rooms, so that we can all learn how effective different designs are in practice.
Involve an acoustic consultant! It follows that you need acoustics consultants who are experienced in this type of design. Get them involved early to advise on room shapes and sizes, and make sure that they test and commission the completed rooms, so that we can all learn how effective different designs are in practice.

